As part of a 3 part series we will be publishing several blog posts to get NAV developers started on Business Central extension development.
This first article will outline the options you have available to setup a sandbox environment that you can use to develop your extensions.
You have three options:
1. Online Sandbox Environment
The online Sandbox environment is deployed on the Dynamics 365 cloud services and is managed by Microsoft.
a. How to create the environment:
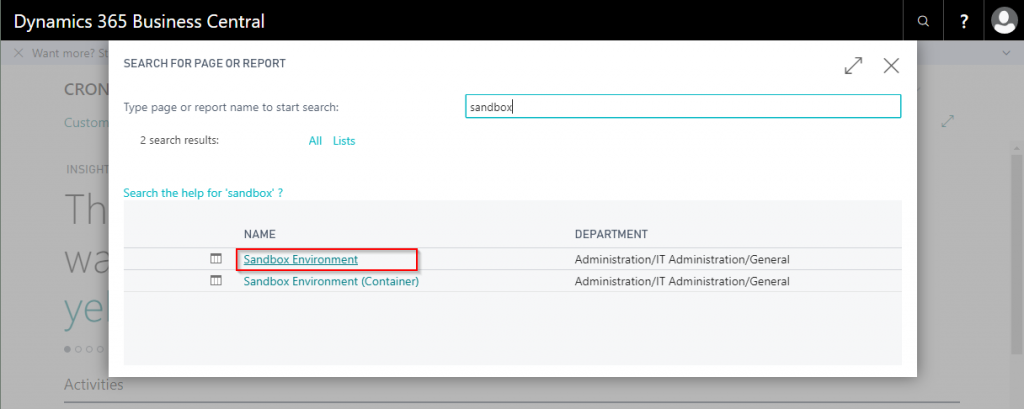
This is the simplest environment to create. Search for sandbox in Dynamics Business Central 365 and click on Sandbox Environment
On the next screen. Read the terms and limitations of the environment and when ready click on create.
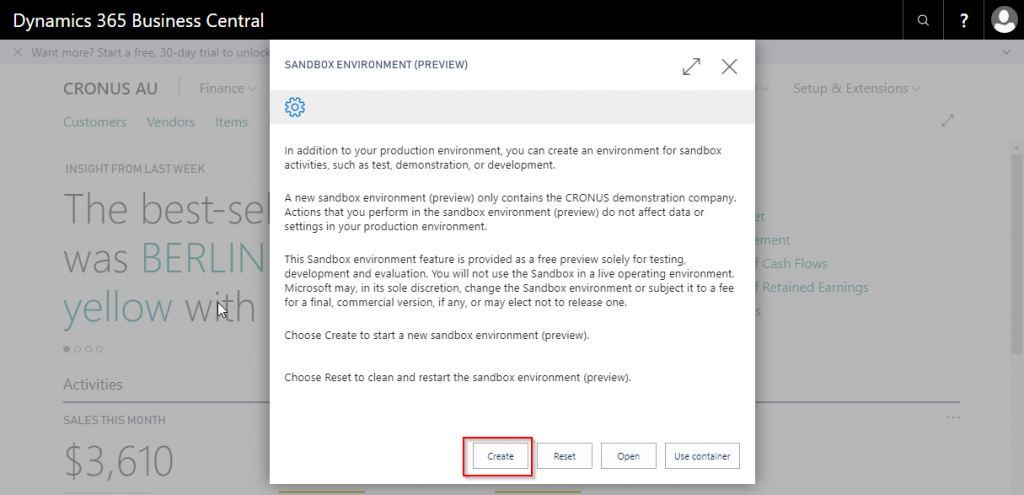
This would provision your environment, and, in a few minutes, you will be forwarded to the sandbox environment.

b. Cost:
This environment is part of your business central subscription and you do not pay anything extra for this.
c. Limitations:
This sandbox environment has a few limitations as compared to the next two environments:
• You do not get database access
• You cannot use on-premise tools like SQL Server Management Studio and C/SIDE
Options 2 and 3 both use container-based sandbox environments.
2. Container Sandbox hosted locally
This would require you to download the sandbox environment locally and setting it up using docker on your on-premise machine. This can be done on a Windows 10 or a SQL server 2016 machine.
a. How to create the environment:
To install and configure docker, use the following links:
Windows 10: https://store.docker.com/editions/community/docker-ce-desktop-windows
Windows Server 2016: https://www.docker.com/products/docker-enterprise
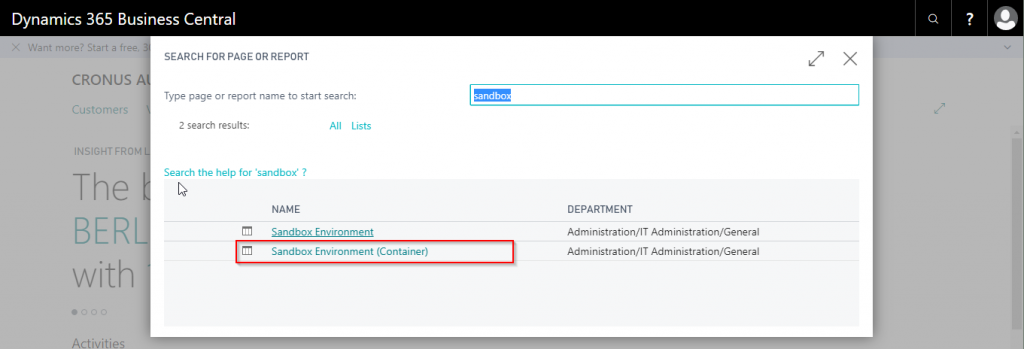
Search for sandbox in Dynamics Business Central 365 and click on Sandbox Environment (Container)
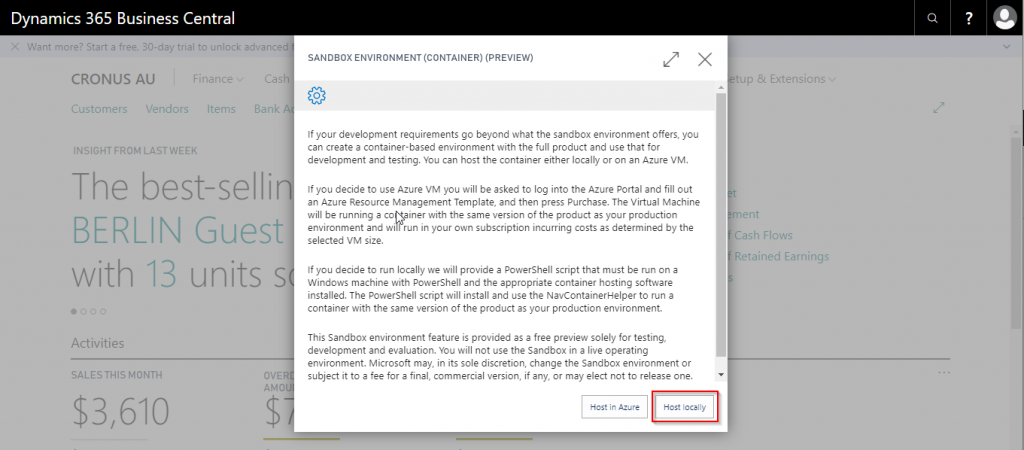
On the next screen. Read the terms and when ready click on Host Locally.
This will download PowerShell file.
Once the download is complete open the file in Windows PowerShell ISE. Make sure you run PowerShell ISE as administrator.
Set the $accept_eula to $true
Set the $containername to your preferred name. e.g. MyNavSBEnv
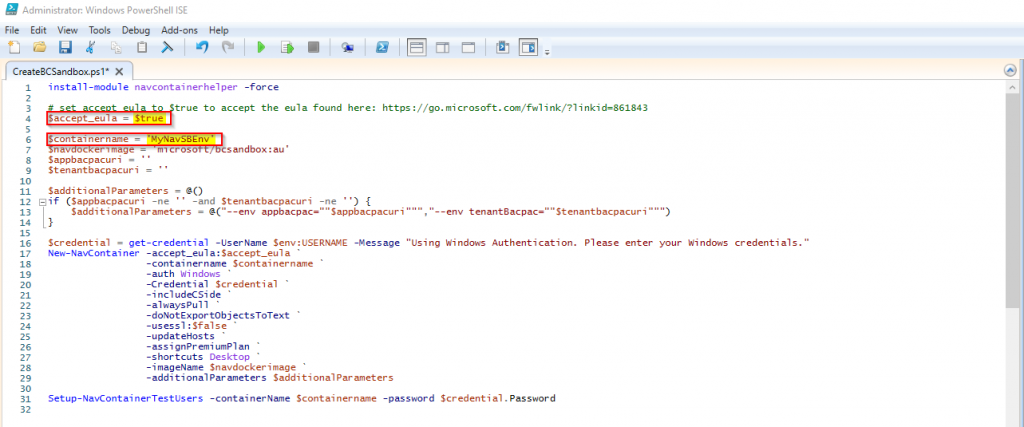
Press F5 to run the script.
When prompted for user name and password. Enter the credentials you want the new image to set as windows admin credentials.
The script would then download and install the docker image. This could take several minutes, and the actual time would depend on your internet connection and system speed.
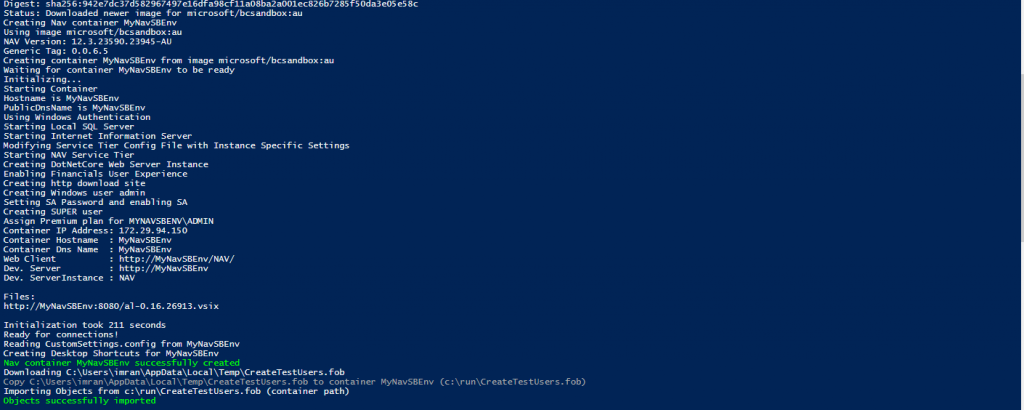
When the script finish running you will have a full development environment running on your local PC. You would see a screen similar to the following if the installation was successful.
b. Cost:
This environment uses your local system resources and as such do not cost you additional money.
c. Limitations:
The only limitation with environment is that the sandbox is installed on your machine and is available only locally. To be able to share this environment with others is cumbersome. For example, if you want this to be accessible by your testing team you will have to make it available on the network and sharing it with the customer may require publishing your machine over the internet.
3. Container Sandbox hosted in Azure
This option would require an azure subscription. If you do not have one you can create a trail subscription at https://azure.microsoft.com
a. How to create the environment:
Search for sandbox in Dynamics Business Central 365 and click on Sandbox Environment (Container)

On the next screen. Read the terms and when ready click on Host in Azure.
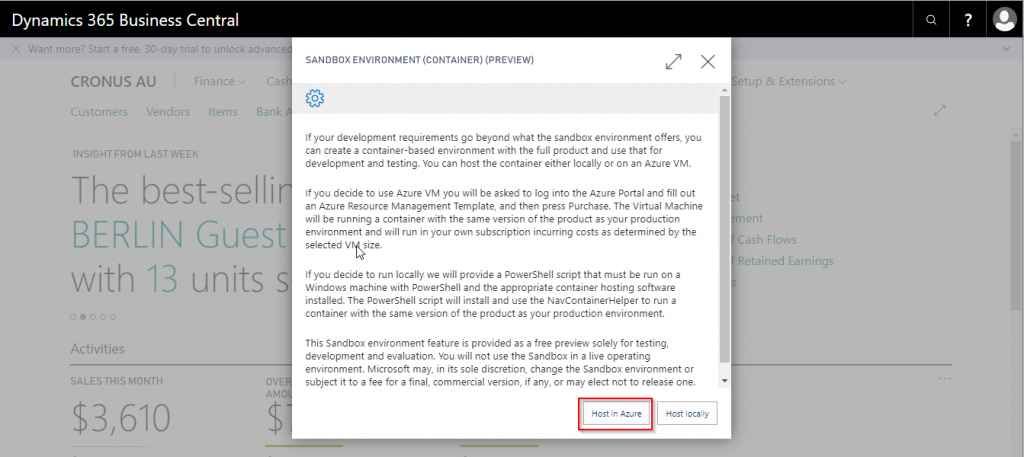
This will take you to your azure subscription and would present you with the following form:
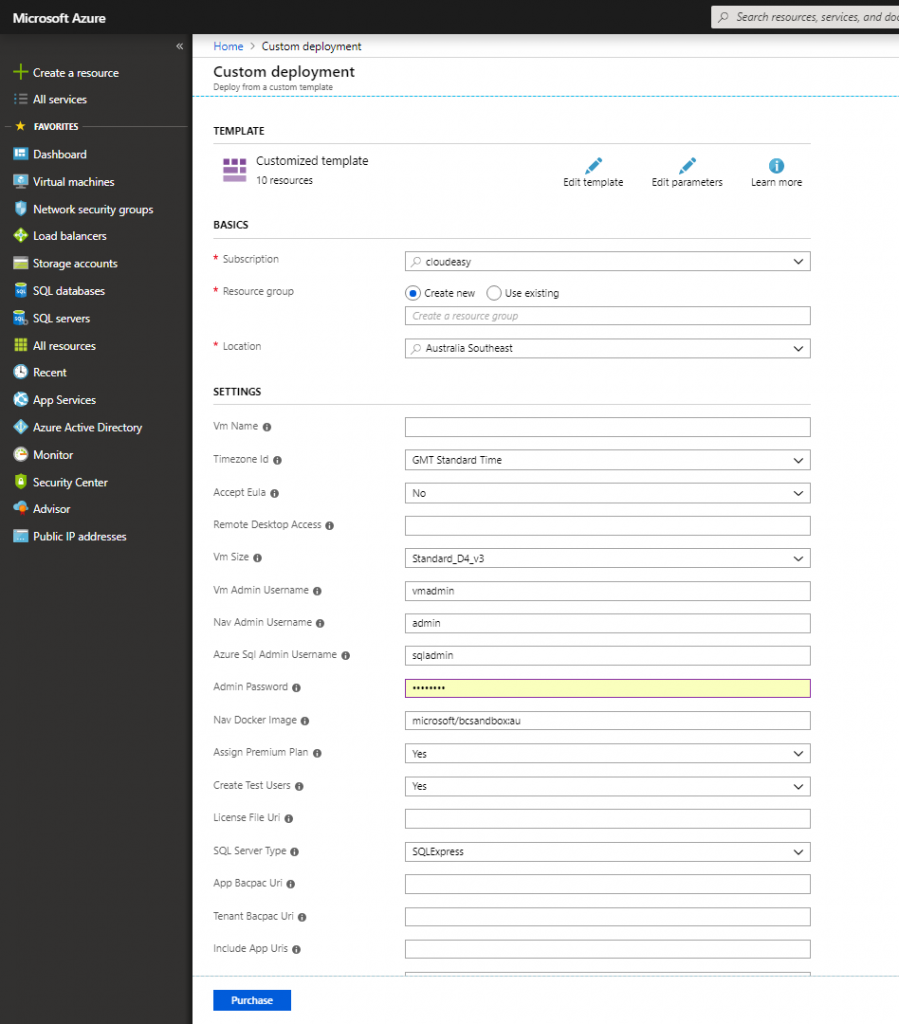
Fill the form, accept the terms and click purchase. This would create a new VM in your azure tenant with preinstalled docker and your image loaded.
b. Cost:
This environment would cost you a fee required to run the VM in Azure, your costs would vary depending on what size of VM you choose and the time you keep it running.
c. Limitations:
This is the most flexible configuration for the sandbox. Although you would require an internet connection all the time to work on this but in most cases these days that cannot be considered a limitation.
Conclusion
All 3 of the above options give you the essentials tools that you require to work on your Dynamics 365 Business Central extensions. You get Visual Studio Code based development environment and the inbuilt Designer. All environments also have the debugging enabled.
But if you need access to database and C/CSIDE you will have to use options 2 or 3.
Now that we have the environment setup, in the next post we will start looking at development environment and how it is different from C/SIDE development environment.
Was this article helpful?

This post was written by Jonathan Martin, COO at Evolution Business Systems.
His expertise extends to software development, support, implementations and project management, he can envisage potential problems and identify them to improve the client experience and outcomes, like a mad scientist, behaviour, statistics and data are where he gets his insights from and lives by a golden rule to always start at the beginning as there are no shortcuts. Jonathan’s passion is to make a difference by assisting clients with their business problems.